There is a unique power in a minimalist bird image, one where clean whites and soft tones allow a sharp subject to practically float in the frame. When executed correctly, high-key photography feels refined, intentional, and ethereal. However, there is a fine line between a "high-key" masterpiece and an accidentally overexposed snapshot. The secret lies in moving beyond "bright" and learning to control light, background, and exposure with purpose.
Whether you are faced with a grey New Zealand morning or a misty lakeside, these eight steps will help you turn "flat" light into your greatest creative asset.
1. Start With the Right Conditions
Successful high-key photography is rooted in lighting that lacks high contrast. Instead of fighting the harsh, directional shadows of a sunny day, you should seek out "flat" lighting provided by overcast skies or morning fog or even snow. These conditions act as a natural softbox, allowing you to brighten the overall image without creating distracting, pitch-black shadows on the bird’s underside or under its wings.
Tip: Check the weather for "high cloud" days. These provide the brightest white light without the dingy grey cast of a heavy storm.
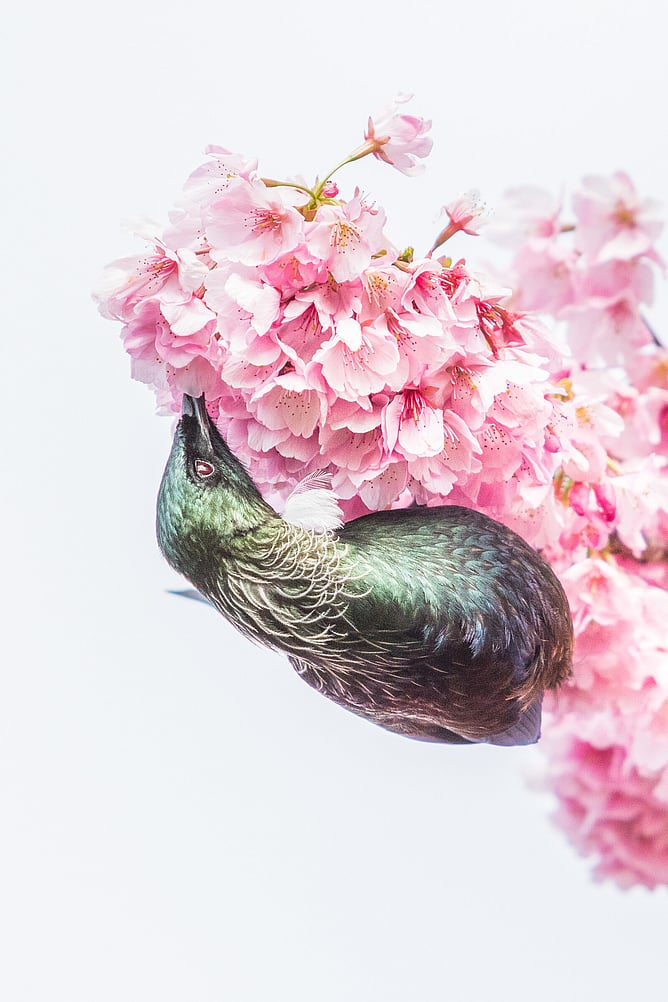
Field Example: A overcast morning at my local park was my "gold mine" for this technique offering a elegant photo of a Tui bird feeding, the overcast sky did 90% of the work for me.
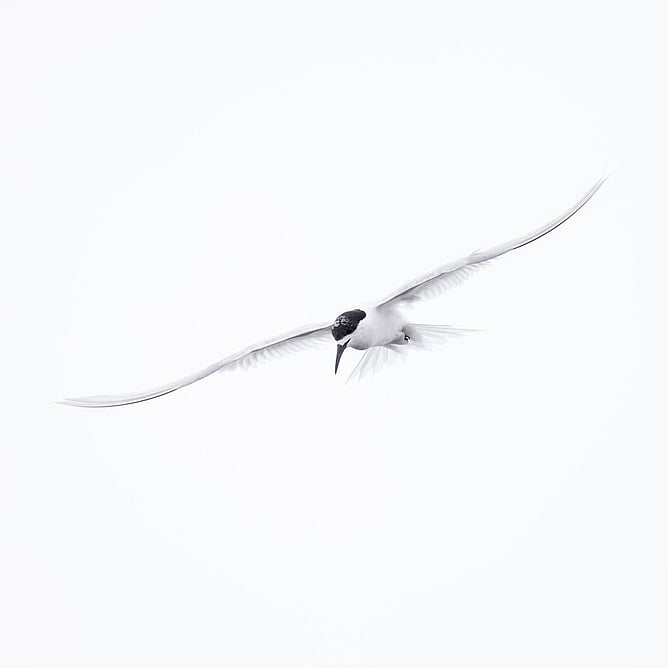
2. Choose a Clean, Bright Background
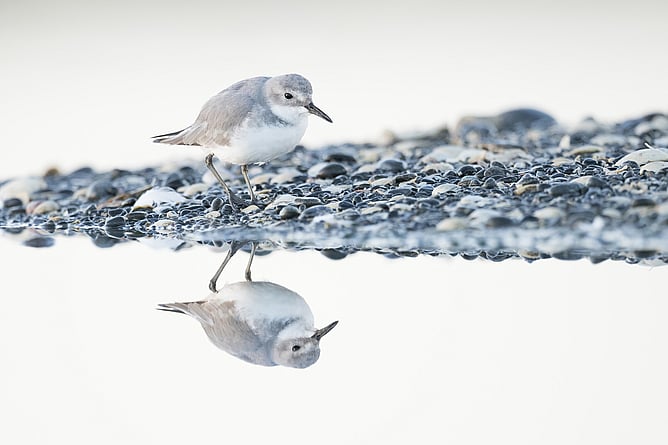
The "key" in high-key refers to the tonal range, meaning you need a canvas that is already predisposed to being white or very light. By positioning yourself so the bird is framed against a pale sky, sand, or reflective water like in the image above, you ensure that the background will melt away into a minimalist void once you increase your exposure. Often, achieving this is simply a matter of lowering your physical perspective or shifting slightly to swap a dark background for a bright, open horizon.
Tip: Use the "Live View" on your camera to see how the background changes as you move your body. Even a small shift can hide a dark branch or background.
Field Example: You get as low as possible, ideally at water level to eliminate any dark distant shorelines from the frame. This ensures the background is 100% bright, reflective water.
3. Push Your Exposure (On Purpose)
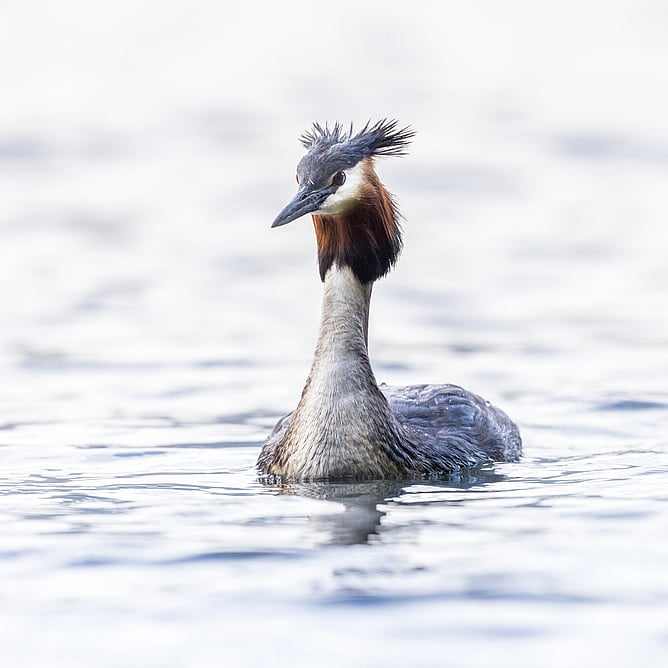
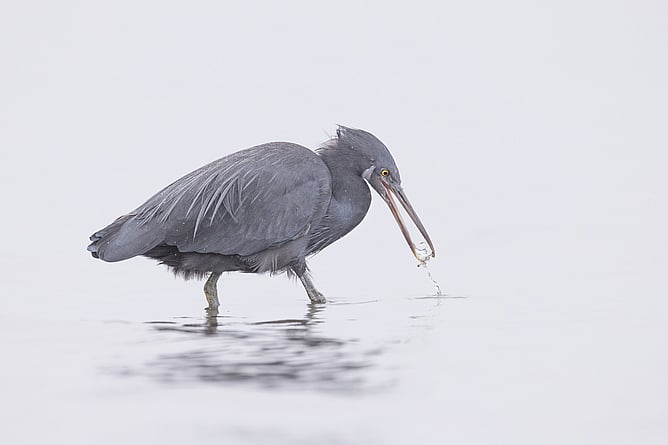
Because digital cameras are programmed to see the world as "middle grey," they will naturally try to underexpose a bright scene to make it darker. To achieve a high-key look, you must manually intervene by using Exposure Compensation to "overexpose" by 1 to 3 stops. The goal is to shift your histogram to the right, making the whites bright and airy while being careful not to "clip" the highlights so much that you lose the delicate texture of the bird’s feathers.
Tip: Turn on your "Highlight Alert" (the "blinkies") in your playback settings. If the bird’s feathers are blinking, you've pushed it too far.(Note image above I went slightly to far with clipping on the birds chest)
Field Example: Start at +1.3 EV and take a test shot. If the background still looks grey, nudge it up to +2.0 EV.
4. Keep the Bird Razor Sharp
In a high-key image, there are very few elements for the viewer to look at, which means the elements that are there, like the bird’s eye and feathers must be impeccably sharp. Any blurriness is magnified by the bright, clean aesthetic of the shot. To ensure a crisp subject, maintain a fast shutter speed (at least 1/1000s) and do not hesitate to increase your ISO to support that speed, as modern editing software can handle noise much better than it can handle motion blur.
Tip: Use "Animal Eye AF" if your camera has it. If the eye isn't sharp, the high-key effect often fails to look intentional.
Field Example: On a dull day, don't be afraid of ISO 3200. A sharp, slightly grainy photo is a keeper; a blurry, clean photo is a delete.
5. Use Spot Metering for Better Control
Standard evaluative metering can get "confused" by large areas of bright sky, often resulting in a bird that looks like a dark silhouette. By switching to spot metering, you tell the camera to prioritize the light reflecting specifically off the bird. This gives you a more accurate baseline for the subject’s exposure, which you can then intentionally brighten to ensure the bird remains the detailed centerpiece of an otherwise glowing scene.
Tip: Map your "Spot Metering" to a custom button so you can toggle it on quickly when the lighting gets tricky.
Field Example: When shooting a white bird against a white sky, spot metering ensures you don't lose the "form" of the bird in the brightness.
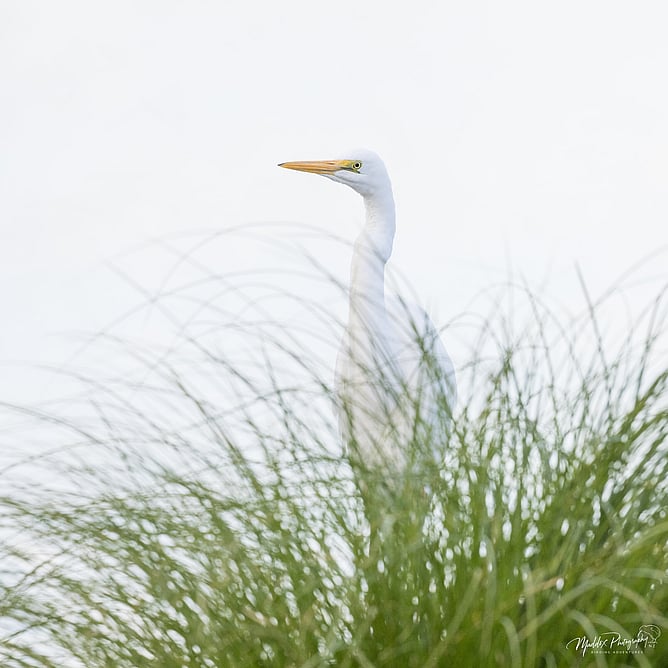
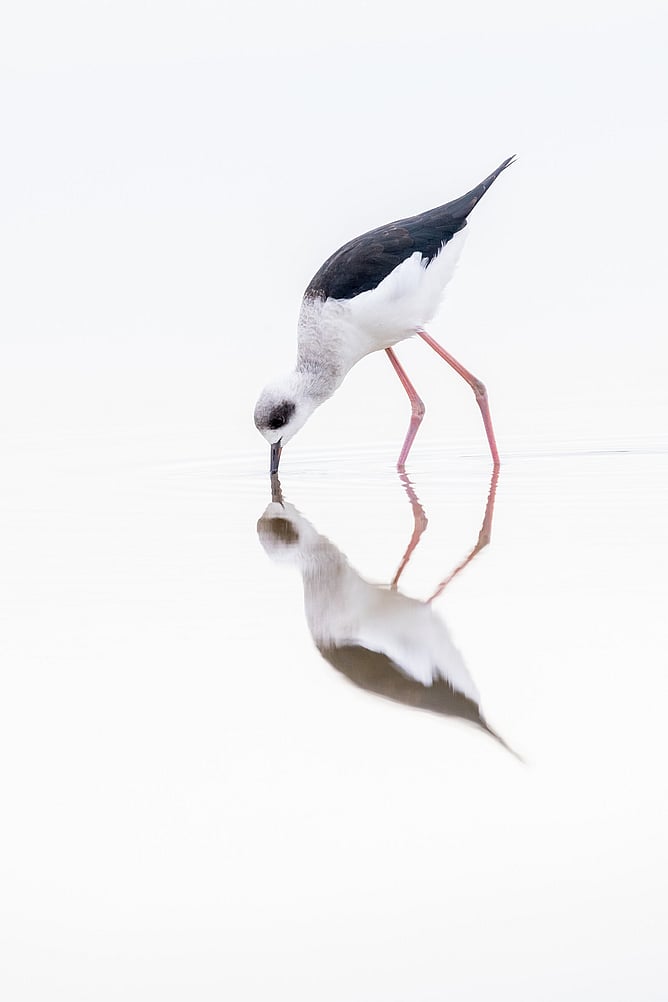
6. Choose the Right Subjects
While any bird can technically be photographed high-key, the technique shines brightest with species that already possess light or white plumage, as they blend harmoniously into the ethereal aesthetic. However, the style also works for darker birds if the focus is on their shape and silhouette. The most important factor is "separation" the subject needs to have a clear, defined outline that stands out against the pale environment to maintain the image's impact.
Tip: Look for birds with interesting silhouettes, like the curved neck of a Heron or the distinctive beak of a Spoonbill.
Field Example: A Pied Stilt (Poaka) works surprisingly well because its stark black-and-white feathers create a bold graphic look against the bright water. (picture below)
7. Think Minimal, Not Just Bright
True high-key photography is a philosophy of subtraction; it is as much about what you leave out of the frame as what you put in. Beyond just being a bright photo, the composition should feel calm, elegant, and uncluttered, utilizing "negative space" to let the subject breathe. If the image feels busy or chaotic, no amount of overexposure will turn it into a high-key masterpiece, simplicity is the ultimate goal.
Tip: Follow the "Rule of Thirds," but leave the majority of the frame as empty "white space" to emphasise the bird's size and fragility.
High-key photography is your "cheat code" for moody, overcast days! By embracing minimalism and pushing your exposure, you can turn a flat, grey morning into a high-end art gallery. Grab your camera, find a clean background, and start experimenting. Sometimes the best magic happens when the sun stays hidden!