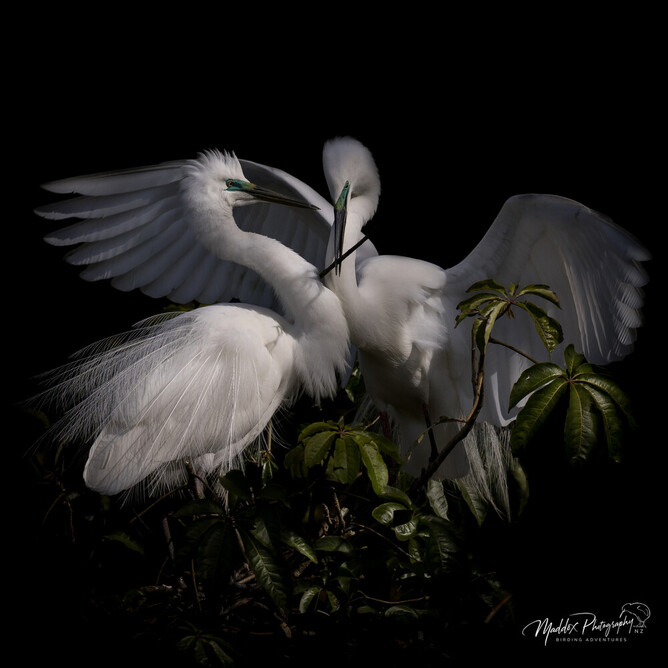
Low-key bird photography is all about mood and atmosphere, turning light and shadow into something dramatic. Instead of filling the frame with bright, balanced light, a low-key image celebrates the darkness. Done well, it draws your viewer straight to the subject while keeping the background almost invisible.
Here’s a simple step-by-step guide to creating your own low-key bird image.
1. Look for the Right Scene
The foundation of a good low-key image starts with the right environment. You’re looking for naturally dark settings where your subject can be isolated against a shadowed background. Ideal locations include:
Areas with dense foliage or deep shade under trees
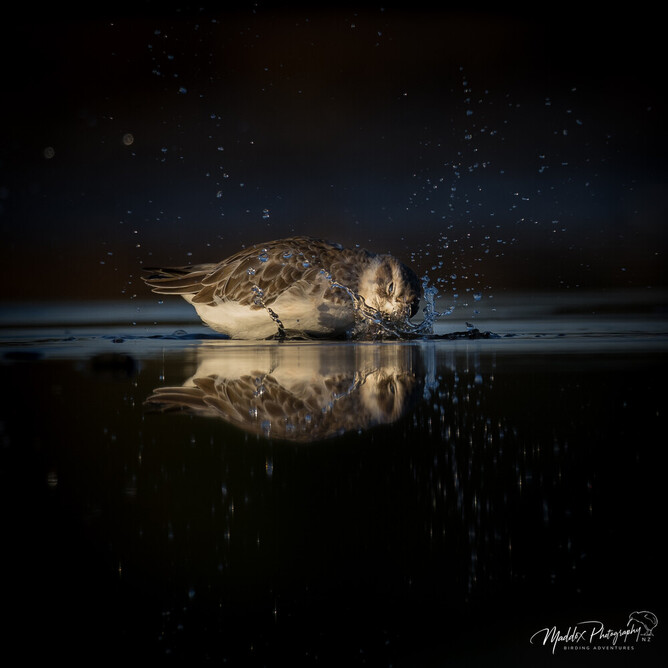
Birds sitting near dark, still water or shaded ponds
Coastal or forest edges where the background drops into shadow
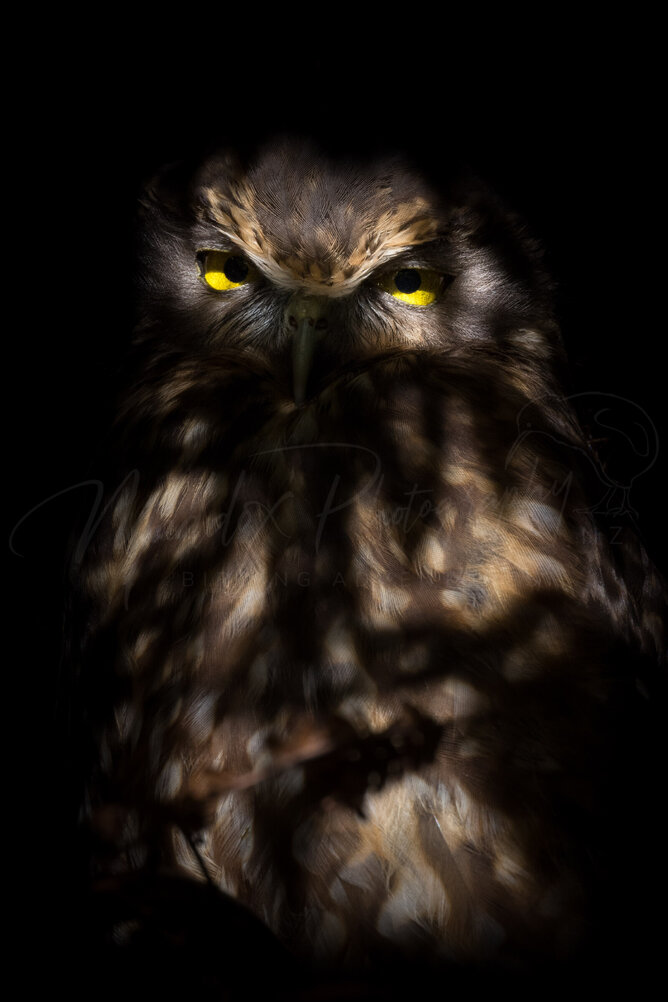
The key is contrast, your bird should be in a patch of light while the surroundings fall into darkness. Early morning or late afternoon light is perfect for this, especially when it hits your subject through a small gap in the canopy. (Example: light hitting a Morepork (ruru) in a heavily shaded punga).
2. Wait for the Light
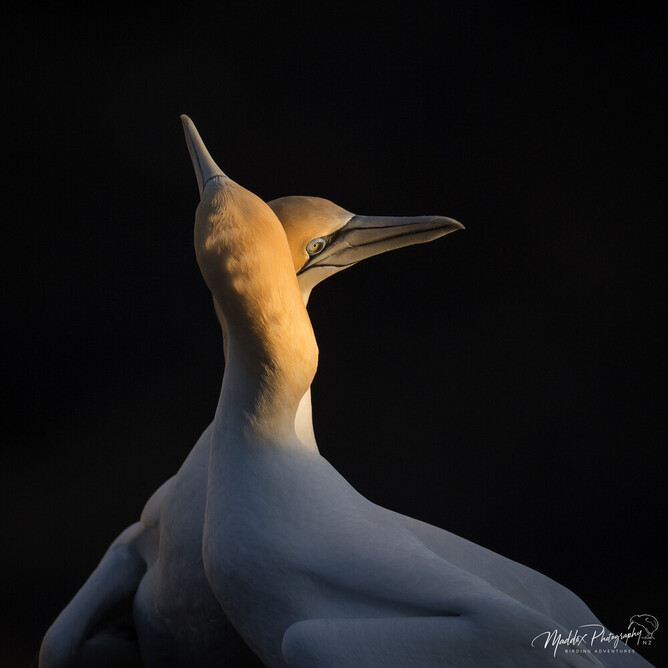
Low-key photography isn’t about having less light, it’s about using light selectively. Watch how light moves across your subject. A single shaft of light on the bird’s head or chest can be enough to create a stunning effect.
Position yourself so the bird is lit from the side or slightly from behind, letting the highlights carve out detail while shadows take over the rest.
3. Switch to Spot Metering
This is one of the most important technical choices.
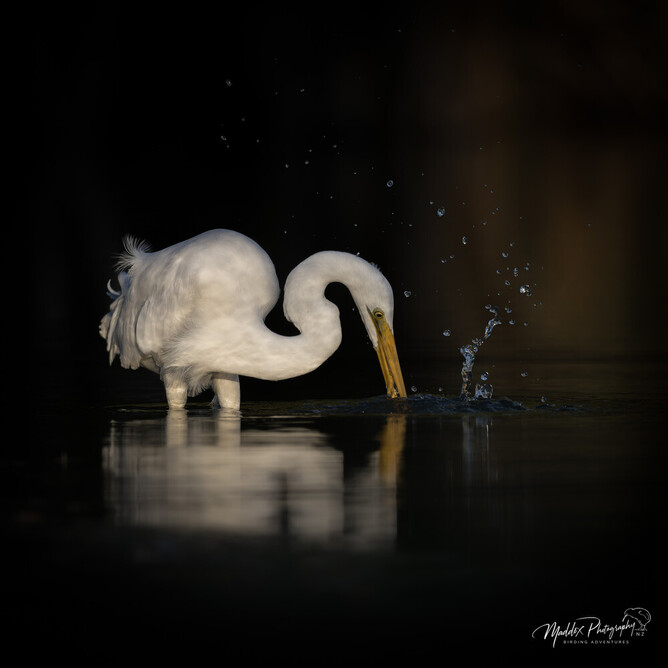
Set your camera to Spot Metering Mode and meter directly off the bird’s brightest area, such as the face, chest, or beak.
By doing this, your camera exposes for that small patch of light and naturally lets the background drop into deep shadow, perfect for that moody, low-key style. (I used spot metering, and metered off the Kōtuku's head, -3 stops of light)
4. Adjust Your Exposure Manually
Start with your base exposure and then dial in some negative exposure compensation (-1 to -2 stops is a good range). You want to ensure the highlights on the bird are correctly exposed without blowing out, while everything else fades into darkness.
If you’re shooting in manual mode, keep your shutter speed fast enough to freeze movement and adjust ISO and aperture to match.
5. Focus on the Eyes
Even in a low-key image, the eyes should remain sharp and alive. Use single-point autofocus or eye-detect AF if available, and take your time to get that critical focus. In post-processing, you can lift the catchlight slightly for more impact.
6. Keep the Background Simple
A low-key shot works best when there’s minimal distraction. If your background still has light patches, shift your position slightly until it’s clean and dark (this might not always be possible so always ensure you take a shot). Shooting with a wide aperture (f/2.8–f/5.6) will also help blur any unwanted detail.
7. Finish the Look in Post-Processing
In editing, fine-tune the balance between highlight and shadow.
Lower the blacks and shadows carefully to deepen contrast
Bring up the highlights just enough to retain feather detail
Use a vignette to further draw the eye to your subject
The goal is to create an image that feels rich and moody, not underexposed.
Final Thoughts
Low-key bird photography challenges you to think differently about light. Instead of chasing brightness, you’re crafting atmosphere and storytelling through shadow. It’s a style that rewards patience and careful observation but when it works, the results are powerful and timeless.
So next time you’re out in the field, look for that pocket of light in the dark and see what magic unfolds.