Have you ever photographed a tūī against a bright sky, only to find the bird looks almost completely black? Or photographed a white heron in sunlight and lost all the detail in its feathers?
These are common challenges in bird photography, and they often come down to how your camera measures light.
Understanding metering modes gives you more control over exposure, helping you capture the detail, colour and texture that make bird photography so rewarding.
In this guide, we’ll use Canon cameras as our main example as I'm a Canon shooter, with equivalent settings for Nikon, Sony and OM System.
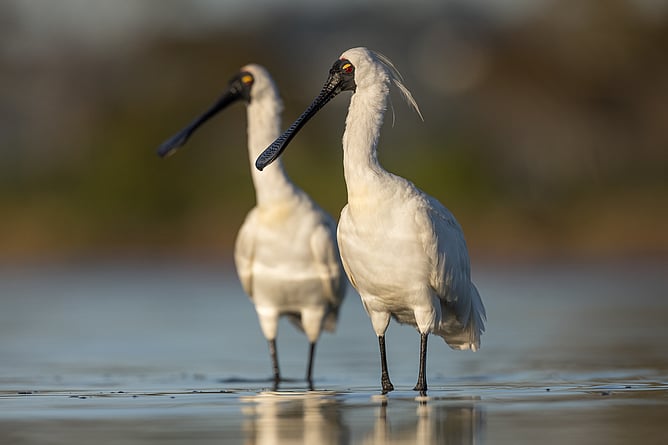
What is metering, and why does it matter?
Your camera has a built-in light meter that measures the light reflected from the scene. It uses this information to help determine exposure, depending on your shooting mode and settings.
The tricky part is that your camera doesn't know what you're photographing. It sees brightness, not a tūī, a kererū or a white heron.
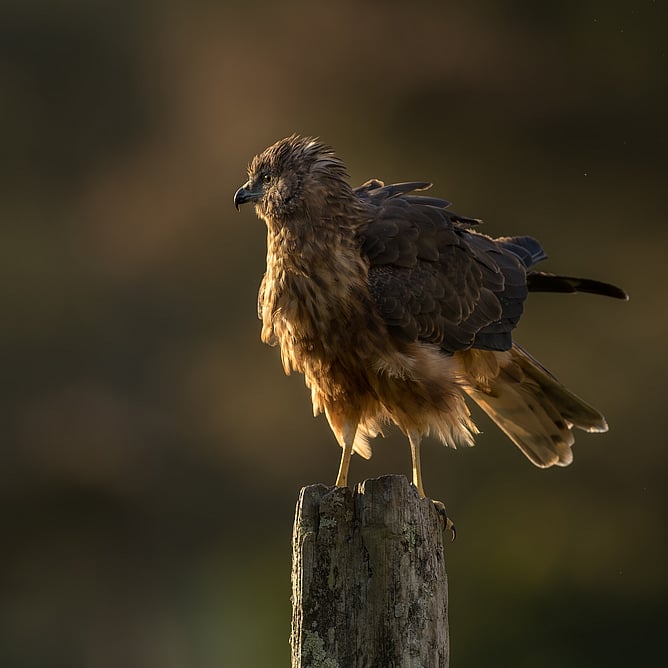
Imagine photographing a dark tūī against a bright, overcast sky. The large area of bright sky can influence the camera's exposure reading, leaving the bird underexposed. The opposite can happen when photographing a white bird against a dark background.
As wildlife photographers, understanding how your camera measures light is important because automatic exposure doesn't always give you the result you want.
This is where metering modes come in. On Canon cameras, there are four main modes: Evaluative, Partial, Spot and Centre-weighted Average.
A note about metering modes
Metering modes are particularly useful when shooting in semi-automatic modes, such as Shutter Priority (Tv), Aperture Priority (Av), Programme mode (P) or Manual mode with Auto ISO. In these situations, your camera uses its metering system to help determine the exposure, and you can use exposure compensation to fine-tune the result.
When shooting in full Manual mode, with the shutter speed, aperture, and ISO all set by you, the metering mode will not directly change the exposure of your photograph. However, your camera's exposure meter still provides a reading to help you judge whether your settings are likely to produce a brighter or darker image than the camera considers standard. You then decide whether to adjust your settings.
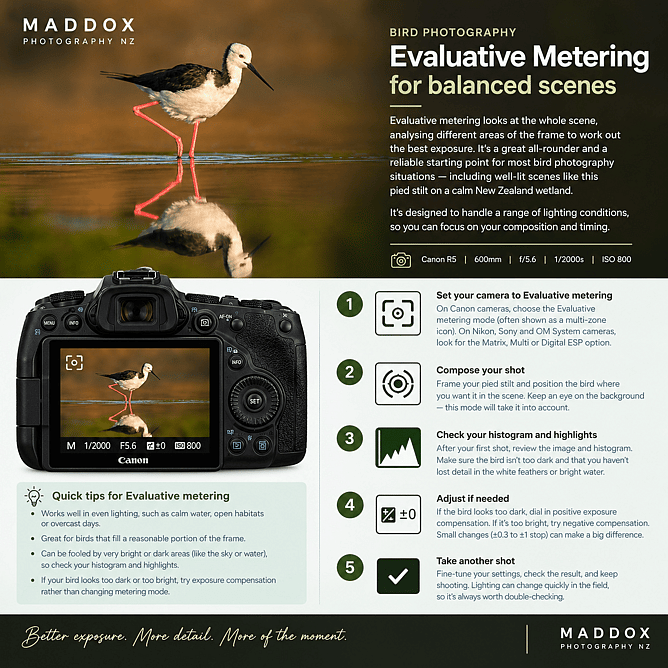
Evaluative metering: your everyday starting point
Evaluative metering analyses different areas of the frame to calculate an overall exposure. It's designed to work across a wide range of scenes and is generally the best place to start when learning bird photography.
When should you use it?
Imagine photographing a Pied stilt (Poaka) feeding in water in soft evening light. The bird and its surroundings are reasonably evenly lit, so Evaluative metering will often produce a good exposure.
It can also work well for birds in flight, particularly when the lighting and background aren't too challenging.
However, if the bird moves against a bright sky, the exposure may no longer be ideal.
The takeaway: Use Evaluative metering for most everyday bird photography. Learn how it responds to different lighting before changing modes.
Works in: Shutter Priority (Tv), Aperture Priority (Av), Programme mode (P) or Manual mode with Auto ISO. Use Exposure compensation for final adjustments
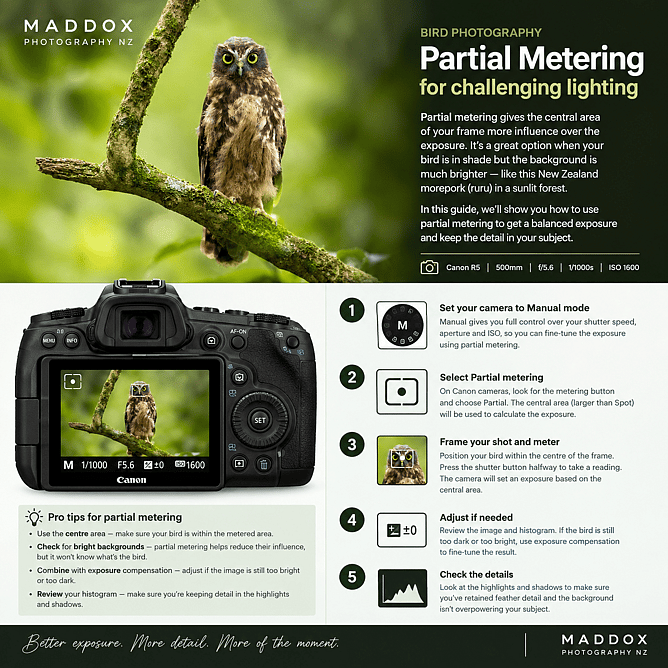
Partial metering: reducing the influence of the background
Partial metering measures a central area of the frame around 10%, larger than the area used by Spot metering. This gives the central area more influence over the exposure reading.
When should you use it?
Picture a Morepork (Ruru) resting beneath a tree canopy, with bright sunlight filtering through the branches behind it. The bird is in shade, but the background is much brighter.
Partial metering can help if the bird falls within the measured area, allowing the camera to give more weight to the central portion of the scene.
The important thing to remember is that Partial metering doesn't automatically recognise the bird. It measures light within a designated area of the frame.
The takeaway: Try Partial metering when your bird is near the centre and the background is significantly brighter. Note not all Canon cameras offer this mode.
Works in: Shutter Priority (Tv), Aperture Priority (Av), Programme mode (P) or Manual mode with Auto ISO. Use Exposure compensation for final adjustments
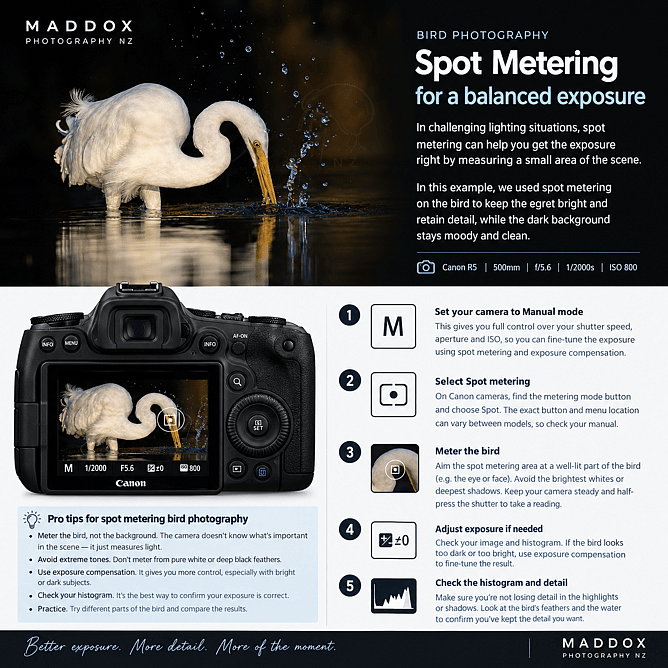
Spot metering: measuring a very small area
Spot metering measures a small area of the scene about 2-5%. It can be particularly useful when your bird is much brighter or darker than its surroundings.
When should you use it?
Imagine photographing a white heron standing in dark water or shaded wetlands. Your camera may try to balance the bright white plumage with the darker surroundings, which can sometimes lead to the feathers being overexposed or losing detail.
Spot metering allows you to measure a small area of the heron, giving you more control over its exposure. However, there’s an important catch: your camera doesn’t know the subject is white. It interprets the light it measures and may try to render that brightness closer to a midtone, potentially making the white feathers appear grey.
To avoid this, you may need to use positive exposure compensation to keep the heron looking naturally white. The amount will depend on the lighting, so check your histogram and highlight warnings to make sure you retain detail in the feathers.
The takeaway: Spot metering offers more control, but it isn't automatically more accurate. Use it when you understand the light and are prepared to check your results.
Works in: Shutter Priority (Tv), Aperture Priority (Av), Programme mode (P) or Manual mode with Auto ISO. Use Exposure compensation for final adjustments
Centre-weighted Average: giving the centre more importance
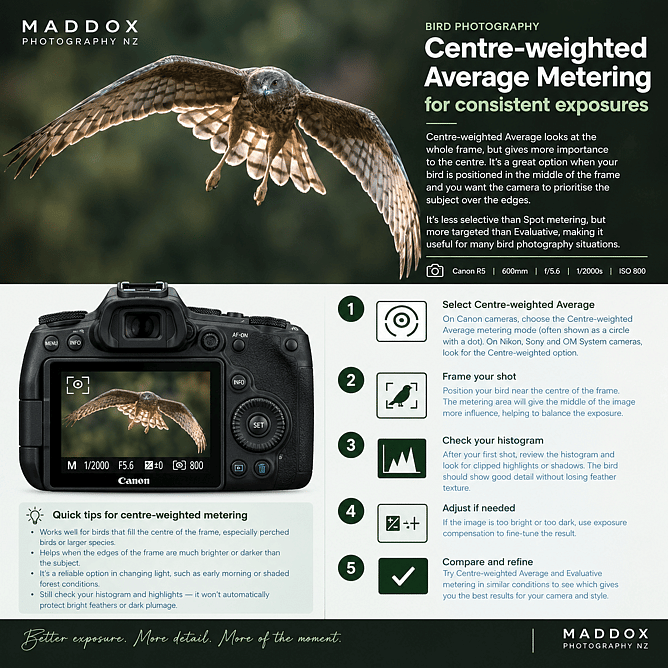
Centre-weighted Average measures light across the frame but gives greater importance to the centre. Unlike Spot metering, it considers a much larger area.
When should you use it?
Imagine photographing a Harrier hawk (Kahu) flying over some paddocks close by, filling much of the centre of your frame. If the surrounding background is much brighter or darker, Centre-weighted Average gives more influence to the area around your subject.
It's a useful alternative when you want the centre to matter more without relying on a tiny metering area.
The takeaway: Try it with centrally positioned birds, particularly when the edges of the frame have very different brightness levels.
Works in: Shutter Priority (Tv), Aperture Priority (Av), Programme mode (P) or Manual mode with Auto ISO. Use Exposure compensation for final adjustments
What about Nikon, Sony and OM System?
The principles are similar across brands, although the names and available modes vary by camera model.
Canon: Evaluative, Partial, Spot and Centre-weighted Average.
Nikon: Matrix, Spot, Centre-weighted and Highlight-weighted on supported models.
Sony: Multi, Spot, Centre and Highlight on supported models.
OM System: Digital ESP, Spot and Centre-weighted options, depending on the model.
For most bird photography, start with your camera's general-purpose mode: Evaluative on Canon, Matrix on Nikon, Multi on Sony, or Digital ESP on OM System. Experiment with other modes when the lighting becomes difficult.
Remember that metering works with Shutter Priority (Tv), Aperture Priority (Av), Programme mode (P) or Manual mode with Auto ISO, using exposure compensation for final adjustments. When shooting in full Manual mode, with the shutter speed, aperture, and ISO all set by you, the metering mode will not directly change the exposure of your photograph.
Behaviour can vary between models, so check your camera manual for the exact options available.
Don't forget exposure compensation
Metering is only one part of getting the exposure right.
If you're using an automatic exposure mode and your bird looks too dark, positive exposure compensation can help brighten the image. If a white bird is overexposed and losing feather detail, negative compensation may help.
The amount you need depends on the lighting and your camera settings. Check the histogram and highlight warnings rather than relying on a fixed adjustment.
Also remember that metering modes don't freeze movement or control depth of field. For sharp bird photographs, shutter speed, aperture, ISO and focus settings remain important.
Try this on your next bird photography outing
Find a bird perched against a bright background or even better use a stuffed toy as they won't fly away. Take one photograph using Evaluative metering, then try Spot metering.
Compare the two images:
Is the bird brighter or darker?
Have you retained detail in the feathers?
Has the background changed in brightness?
Would exposure compensation improve the result?
This simple exercise helps you understand how your camera responds to different lighting, rather than relying on a setting simply because someone recommends it.
My final words
There isn't one metering mode that works perfectly for every bird or every lighting situation. Evaluative metering is an excellent starting point, while Partial, Spot and Centre-weighted Average give you alternative ways to measure light when the scene becomes more challenging.
The more you understand how your camera reads a scene, the better equipped you'll be to make exposure decisions in the field. I have attached a really good video below that explains metering perfectly.
Happy birding, and happy shooting!